
 24/7 Emergency Service
DIY Eucalyptus Wreath
2/28/2020 (Permalink)
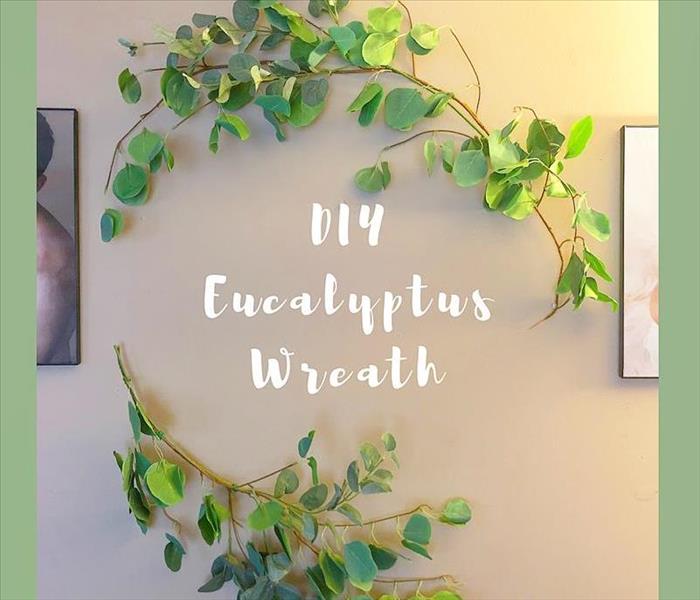 DIY Eucalyptus Wreath Completed
Ever see those beautiful eucalyptus wreaths and think to yourself, “Man, I’d love to have one of those in my house!” And then you go online or in the store to buy one and see that they’re $30 or more?! Especially for the larger ones, which of course is the only way to go!
Don’t worry. You’re not alone!
I wanted one for the longest time - a large one. I did NOT want to pay the $65 for it though! So, I decided to look into making it myself.
Sure, it’s a bit more time consuming, but if I could save enough money it would be well worth it.
First, I went online and searched “diy eucalyptus wreath”. This, of course, popped up a multitude of options to create. I mean, there are SO MANY variations of eucalyptus wreaths you can create and so many ways to do it!
I knew I wanted 2 small breaks in mine so that it wasn’t a full circle though. Once I knew that and saw a few different ways to go about it, I bought my supplies.
What you will need if you want the same type of wreath:
- One 6’ Eucalyptus Garland
- Two 24” Eucalyptus Branches/Bushes (used in floral arrangements)
- Green floral Wire
- Wire Cutters or Scissors
- 4-6 Clear Push Pins/Thumb Tacks (for hanging)
How to Assemble:
- First you want to cut your garland in half. It doesn’t have to be perfect, just close.
- Cut about five 6” pieces of floral wire.
- Take one eucalyptus branch and start to attach it to the garland using the floral wire and making sure that the branches and leaves are going on the same direction. I tied mine together at the base, and toward the top before the branches thin out a lot. Feel free to add more if needed.
- Shape the combined branches into a loose semi-circle and spread the branches apart to how you want them. The best way to do this is to lay it flat on the ground to get the look you want.
- Repeat steps 1-4 for your second branch.
- With both pieces on the floor, move the branches around until you have the final look you want.
- Take your top branch and hold it up onto the wall where you’re wanting it. (It may be easier to have a second person hold it for you, if possible.) Once you know where you want it, figure out the best placement for your push pins to hold the branches. I used one for about an inch from the bottom, one at the very top center, and another toward the end of the branches to assist with the curve I was wanting.
- Take your bottom branch and repeat step 7. I only used two push pins for this branch, but use as many as you need.
- Step back and look at your wreath. Go in and spread or curve branches as needed.
- Admire your work and beautifully large wreath that only cost about $20
You can also put a picture frame or a word cutout in the center of this wreath, add flowers, or add more greenery. The possibilities are truly endless!
If you decide to try this, send us a picture on Facebook! We would love to see!